Using VisualStudio Code to develop with the M.D.G. IT managed deployment system
This guide describes one of several workflows when working with the M.D.G. IT managed deployment system: using Microsoft Visual Studio Code to both make changes on an M.D.G. IT development server and to then push those changes to Gitlab for deployment to staging and production. Please see Workflow for Developers for other options.
Overview
This method uses Visual Studio Code, a popular, free code editor, to edit files remotely on a development server. The development server itself contains a clone of the Gitlab repository. No files are ever present on your local machine—all changes are made directly on the development server, and are then pushed to Gitlab from there. In this case, VS Code functions as a remote text editor and also as a remote git front end, committing changes to the git repository on the development server, and then pushing those changes upstream to Gitlab.
This guide assumes that you have a development server provisioned by M.D.G. IT, with your Gitlab repository cloned in the webroot directory. Please contact support if you need this set up.
Click the green remote connection icon in the bottom left:
Click "Remote SSH: Connect to Host".
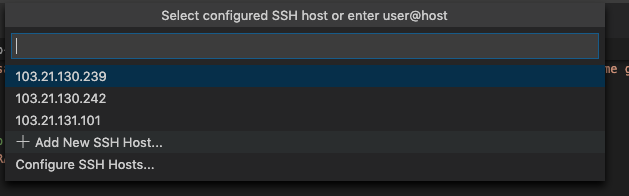
If you have added the SSH host previously, you can click the server in the history and skip to step 7. Otherwise, click "Add New SSH Host".
Enter the command to connect to your development server (see the M.D.G. IT server welcome email for details) and press Enter. The command should take the form of ssh web@<your-server-ip> -p 22222
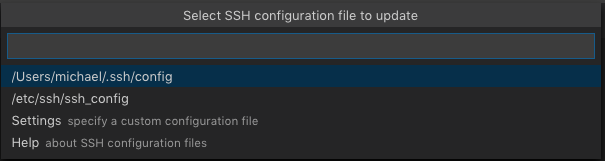
When asked to update a configuration file, click the one at the top of the list. This means it will be saved for next time, and you won't need to enter these details again.
You should see a confirmation pop-up like the following. Click "Connect" to connect to the server.
If you see the following, click "Linux".
Enter your SSH / SFTP password to connect.
Editing Files
After the above steps have been completed, VS Code is now set up so that any changes you make in Visual Studio will be updated on the remote server on save. To edit files:
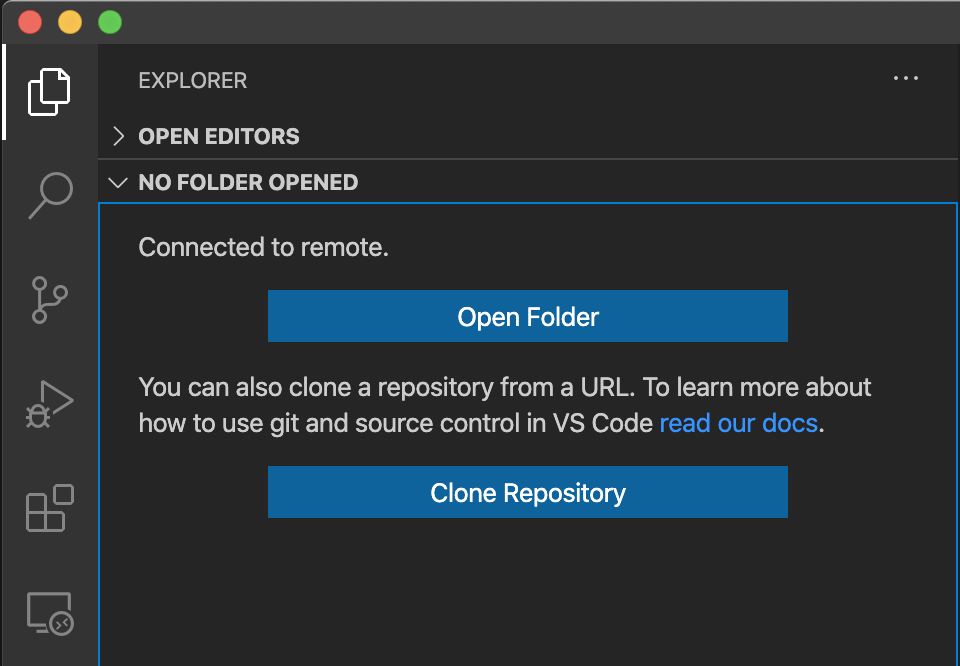
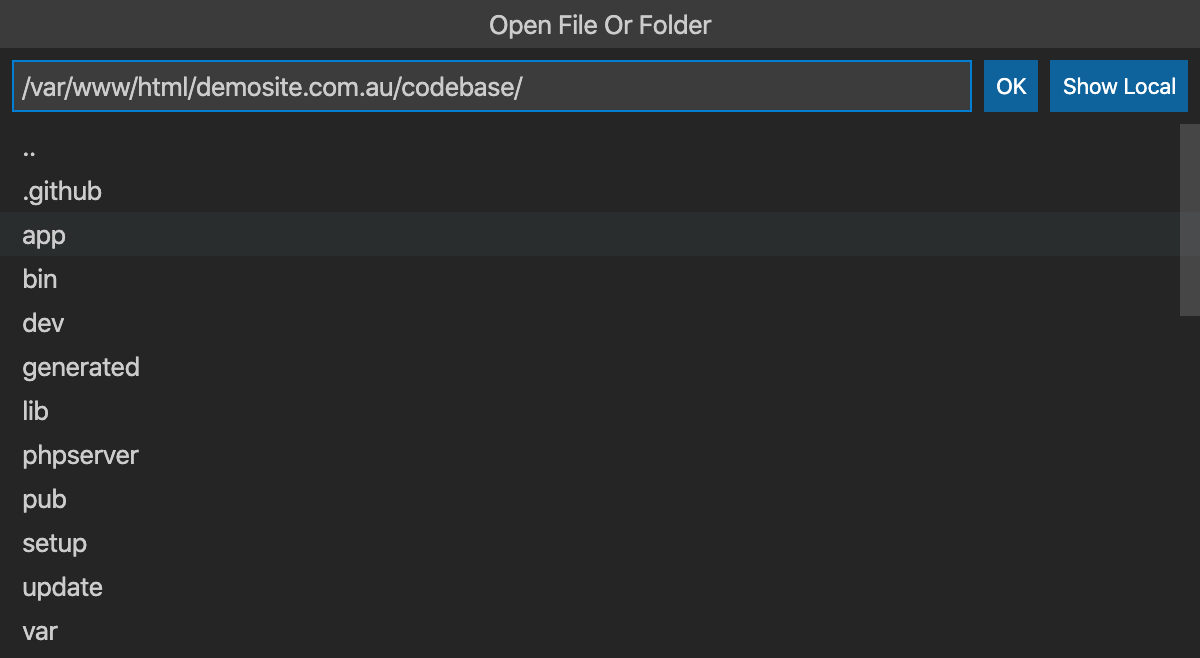
Click the button on the top left, and click Open Folder.
Browse to your webroot. This will normally be in the form of /var/www/html/<site-name>/codebase/ and click OK. You can click on subdirectories below instead of typing the whole path by hand.
You can now edit files, and see the changes reflected immediately on development after saving.
Pushing changes to Gitlab
When you are ready to push changes to Gitlab:
Click the source control icon on the left. VS Code automatically recognises the directory as a git repository, and you should see a list of your changed files. If necessary, click the refresh icon.
Enter a commit message summarising your changes and click the tick icon up the top.
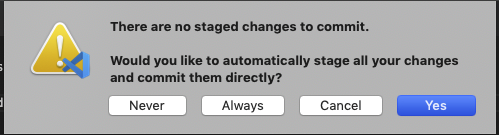
If you see the following message, click "Always" to always commit your staged changes.
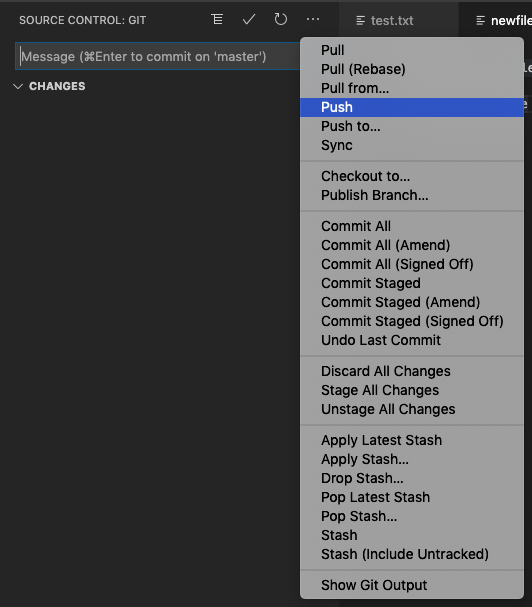
Click the 3 dots up the top and click "Push".
You should now be able to see this commit by logging in to Gitlab and clicking on Commits in your project. From here this commit can be deployed to staging for testing before being deployed to production.
JavaScript errors detected
Please note, these errors can depend on your browser setup.
If this problem persists, please contact our support.